Fig. 7.1
Foamed sclerosant can be seen as hyperechoic bubbles present in the target vein
There are advantages to using a transverse target position for needle access along the long axis of the transducer. The long axis provides for needle identification from the onset of needle introduction into the skin with guidance directly to the target (Fig. 7.2a, b). Manipulation of the image target close to the transducer edge is helpful, as the distance for the needle to travel through tissue is minimized (Fig. 7.3). For optimal visualization, the needle must be kept in the absolute center of the ultrasound transducer beam. The short axis is preferred by some sonologists based on previous training and experience. A transverse target is selected and is positioned into the center of the screen’s image (Fig. 7.4a). Needle access along the center of the transducer is obtained in direct line with the target below (Fig. 7.4b). The disadvantage to this method is non-visualization of the needle tip until it reaches the target.
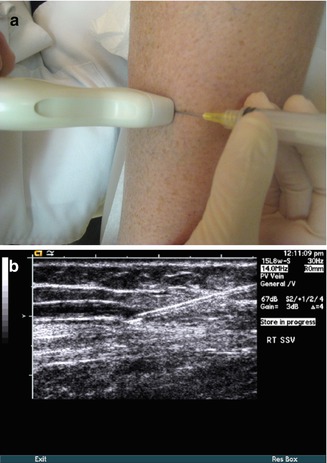
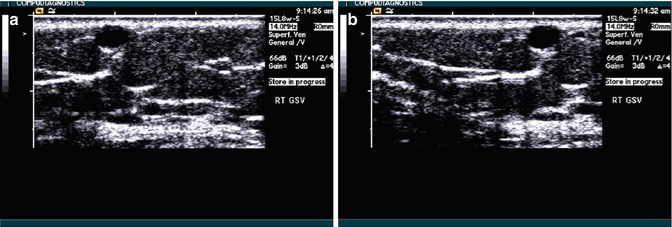
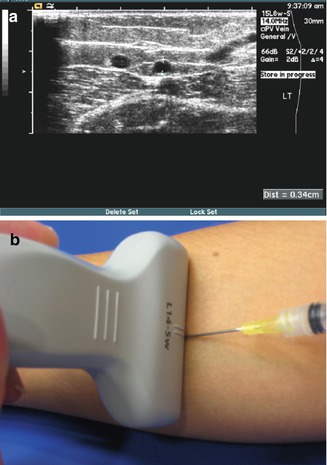
Fig. 7.2
A long-axis ultrasound view allows needle visualization where the needle goes through the skin (a, above) to the target vein (b, below)
Fig. 7.3
(a) Transverse grey-scale image of target vein 2 cm from the needle. (b) Manipulating the transducer medial will reduce the target distance to 1 cm
Fig. 7.4
The transverse image of the target vein is placed at the center of the ultrasound screen (a, above) and the needle is introduced in direct line with the target (b, below)
7.8 Venous Access Principles
The critical role of ultrasound for a preoperative mapping of the saphenous vein to be ablated includes the determination of an access site. The access site selection is not random, but rather it is based on knowledge of multiple extenuating factors. Consideration for the site insertion should favor proper ergonomics, as the technique for access may be a time commitment. It will be helpful to know exactly how the patient will be positioned and plan accordingly with aids available to overcome details such as body habitus or back comfort issues that may arise. The selection process favors a vein at an area closer to the skin, as the technical aspect of venipuncture is less challenging in the near field when compared to a steep angle (Fig. 7.5a, b). Vein diameter must be suitable for successful vein cannulation, as smaller caliber veins (<2 mm) pose the need for greater technical skill. Successful vein access can also be hampered by vasospasm related to a patient’s cool body temperature. A warming blanket and a heating pad are useful aids to encourage vasodilatation. Imposed gravity and tourniquets are useful strategies to increase vein diameter. When feasible, keeping the patient sitting upright may also maximize vein caliber, encouraging dilatation. Local application of 2 % nitroglycerin ointment on the intended access skin site (refer to package guidelines insert for use and/or contraindications of product) has been reported to increase vein diameter and reduce vasospasm. Application has been reported to increase vein diameter as much as 69 % [10].
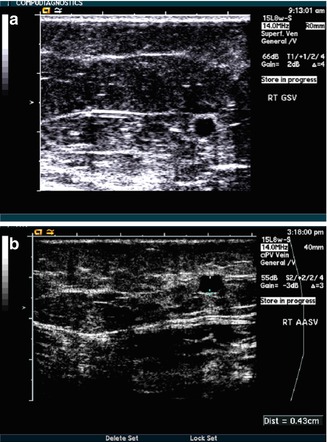
Fig. 7.5
More superficial veins (b, below) are easier to access than deeper veins (a, above)
The access site presumes the vein proximally is fully patent and free from vein kinking or obstructions to permit the passage of a thermal device. Hematoma and excessive bleeding may be minimized by avoiding vein access in regions drained by large perforating veins. Large diameter veins, particularly in the upper thigh, are influenced greatly by the patient’s leg position. Repositioning the patient’s leg may decrease any vein kinking or stretching that may thwart device passage.
The access site designated is also affected by other considerations in the case of thermal ablation. Endovenous catheters and fibers vary in length, thus care must be taken during planning so the type of thermal device used will be generous enough to adequately cover the span of the mapped vein distance. The manufacturers of thermal devices have guidelines for the upper and lower limits of vein diameters as well, thus the ultrasound technologist must be cognizant of these specific recommendations during the mapping for treatment.
Every patient will be unique as to the treatment vein length and access site chosen. However, since the thermal device is controlled by the user, access to the saphenous vein can, in some instances, alternatively be routed via a large tributary in the parallel position to the saphenous vein or in a region not conducive to heat (Fig. 7.6). When in these zones, the thermal device can simply be non-activated to avoid untoward effects to the skin or nerves. Ultrasound is an excellent resource to visualize structures other than veins. Based on its anatomical proximity, the saphenous nerve for the below-knee GSV and the sural nerve (SN) for the SSV are at greatest risk for injury during intervention in the distal calf. Sural and saphenous nerve injury may be reduced by ultrasound visualization to avoid this proximity during intervention (see further text under post-procedural complications).
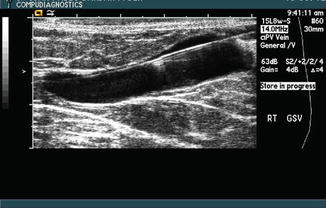
Fig. 7.6
Access to the saphenous vein can be routed
7.9 Venous Access with Seldinger Technique
Once a suitable vein access site is chosen, the patient’s lower extremity undergoes a sterile prep and drape according to the physician’s routine. After an application of adequate gel is placed onto the ultrasound transducer interface, a sterile sleeve is positioned over the surface so the transducer can be used freely during the procedure. Care is taken to reduce air trappings within the sleeve, which can introduce ultrasound artifact and hamper visualization.
Percutaneous vein access is achieved with sonographic guidance. The technique for access can be with the ultrasound transducer positioned in a longitudinal or a transverse view, and skill for either method for access improves with repetition. It is imperative the transducer be maintained in an absolute parallel position on the skin. Manipulation of a needle in three dimensions is often easier to facilitate with a longitudinal view, particularly for the access, wire, and sheath placement. Visualization of the needle tip is imperative to insure a precise puncture into the vein. Soft tissue motion is not a reliable method and, simply stated, is a blind technique. Instead, rely on the real-time ultrasound visualization to successfully guide the needle to the target. Fix attention to identification of the tip of the needle and less emphasis on the length of the needle. Needle enhancement is optimized with high contrast ultrasound settings (i.e., decreased dynamic range [dB]). When the needle is placed along the long axis of the transducer (longitudinal view), needle identification is achieved from the onset of needle introduction into the skin. As the needle tip is advanced through the soft tissue toward the anterior wall of the target vein, “tent” the wall to ensure the needle and ultrasound image are within the same plane (Fig. 7.7). Successful vein penetration is achieved with slight pressure of the needle. For optimal visualization, the needle must be kept in the absolute center of the ultrasound transducer beam.
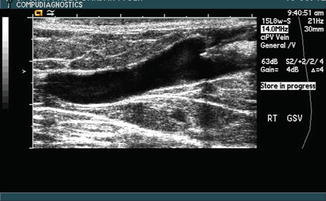
Fig. 7.7
Vein “tenting,” with a needle pushing the superior vein inferiorly, is visible at the right side of the image
The short axis approach is preferred by some sonologists based on previous training and experience. A transverse (short axis) target is selected and is positioned into the center of the screen’s image. Needle access along the center of the transducer is obtained in direct line with the target below. The disadvantage to this method is non-visualization of the needle tip until it reaches the target. Once the tip is visualized, “tent” the anterior wall for vein puncture and proceed through the vein walls. With either method of access into the vein, brisk back bleeding may not be readily observed because of low pressure. Once vein entry (access) is obtained under ultrasound guidance, a guide-wire is placed. A tapered vessel combination introducer/dilator is threaded over the guide-wire.
Stay updated, free articles. Join our Telegram channel

Full access? Get Clinical Tree


