The pulse of the femoral artery should be sought. The femoral vein runs closely medial to the femoral artery. A useful landmark for this area is the inguinal crease which is located about 1 cm below the inguinal ligament in normal weight children and adolescents, but can be misleading in overweight patients [1, 2].
The femoral pulses should be palpated in both groins to feel whether there is a difference in the quality of pulses. If a pulse is blunted on one side due, e.g. vessel stenosis, the puncture of the contralateral vessel should be preferred.
Marking of the vessels on both sides with a pen is done by many operators before covering the child. These markings help to identify the vessels when the landmarks are more difficult to see when the patient is draped (Fig. 11.2).
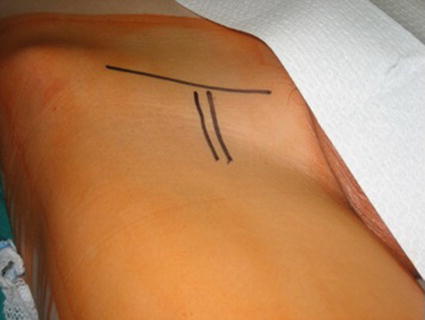
Fig. 11.2
Marking of the landmarks for femoral artery and vein access
Delineation of the vessels by 2D ultrasound and Doppler facilitates the puncture of the vessels (Fig. 11.3). By this method, a stenosis or an occlusion of the vessel can be detected. Furthermore, the passage of the needle can be directed under vision into the respective vessel.
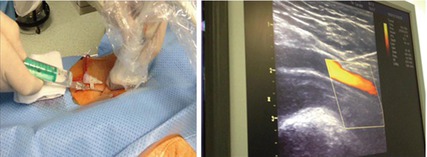
Fig. 11.3
Ultrasound-guided femoral vessel access using a linear probe. The pulsating flow of the femoral artery and the needle directing towards the femoral artery are seen
11.1.2 Technique
It is useful always to prepare both sides of the groin.
For local anaesthesia, infiltrate a small amount subcutaneously. Always withdraw on the hub of the needle to be sure that you are not injecting into the vessel.
Large amounts of lidocaine will distort the underlying vessel. Be aware that the feeling of pain is mainly coming from the skin!
11.1.3 Femoral Venous Access
Usually venous access prior to the arterial one.
Palpate femoral artery. The femoral vein lies directly medial to the artery.
Introduce the needle into the skin just below the inguinal crease.
Angle between needle and skin about 45°.
Advance the needle in short 1–2 mm jabs and wait for the backflow into the needle.
If advanced too far, withdraw the needle slowly with or without a negative suction on an attached syringe.
Having backflow into the needle, hold the needle with the right hand and insert the guide wire into the needle and then into the vessel. The guide wire should get into the vessel smoothly without applying force (Fig. 11.4).
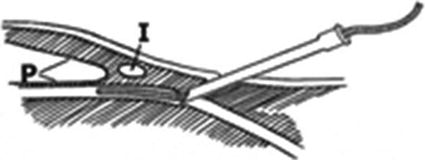
Fig. 11.4
Introduction of guide wire and sheath into femoral vessel below the inguinal ligament (I) far away from the peritoneal sac (P) (From Mullins [2], with permission)
Having the wire in the vessel, make a tiny cut with a blade and insert the sheath with the introducer under a mild rotation into the vein. Thereafter remove the dilator and wire and check appropriate sheath position by withdrawing blood through the side arm of the sheath.
Hints
Withdraw guide wire and needle when the wire cannot be advanced easily. Very likely the vessel is not hit properly.
When the guide wire is very likely in the vessel, but advancement is not possible, change the needle to a small short cannula and try to aspirate blood by withdrawing the cannula and then re-advance the guide wire.
Consider a careful injection of a small amount of contrast medium if there is suspicion of a more distal occlusion of the vessel by, e.g. thrombosis due to previous catheterization [1].< div class='tao-gold-member'>Only gold members can continue reading. Log In or Register to continue
Stay updated, free articles. Join our Telegram channel

Full access? Get Clinical Tree


