CHAPTER 24 Robot-Assisted, Two-Stage, Three-Field Esophagolymphadenectomy—Video 24
Introduction
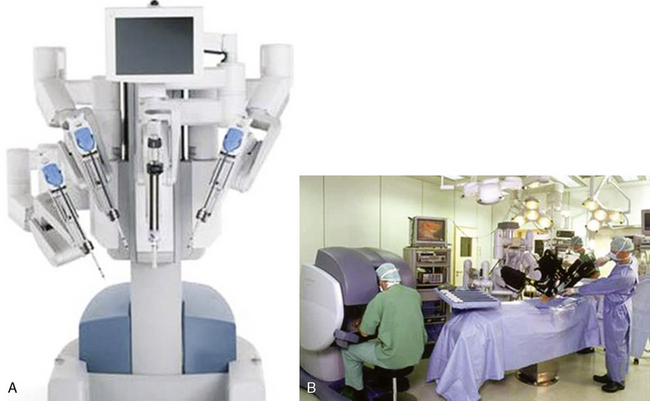
The da Vinci S system has three components: an operating console for the surgeon; a praying mantis–like chassis from which spring the robotic video unit and the three robotic arms; and the electronic communication tower system between the console and the chassis (Figure 24-1).
Approach to Robot-Assisted Esophagolymphadenectomy
Key Points
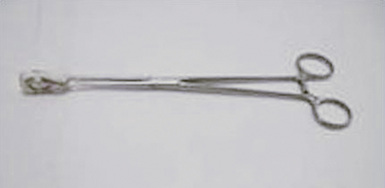
♦ A ring clamp with a heavy sponge or Surgicel attached should be available for immediate use at all times (Figure 24-2).
♦ Use continuous intrathoracic carbon dioxide insufflation to enhance the robot-assisted surgery. Keep the intrathoracic carbon dioxide pressure between 10 and 15 mm Hg to minimize a decrease in venous return and cardiac compliance.
♦ Small lymphatic tributaries seen under high robotic magnification are endoclipped through the accessory port or robotically.
 Robot-Assisted Esophagolymphadenectomy (Video 24)
Step 1. Thoracic-Phase Patient Positioning
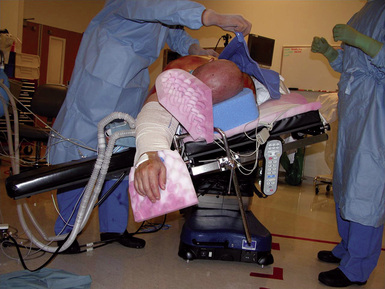
♦ The patient is intubated with a double-lumen endotracheal tube, positioned laterally to slightly face down, and strapped securely to the operating table.
♦ The right arm is well padded and positioned over the ear immediately adjacent to the face with the elbow below the horizontal plane of the right shoulder.
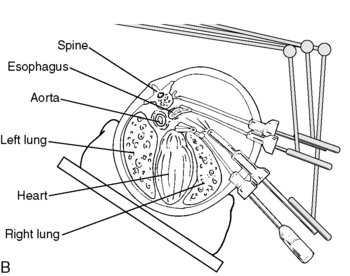
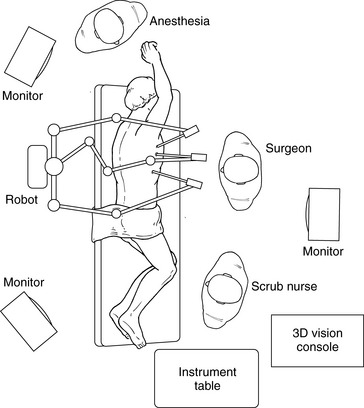
♦ Tilt the operating table as far anteriorly as possible so that the patient is positioned 30 to 45 degrees from prone (Figure 24-3).
Step 2. Thoracic-Phase Port Placement
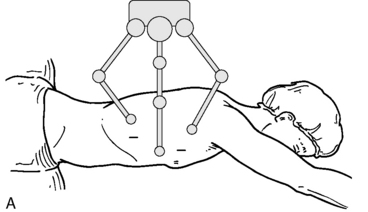
♦ Make five puncture wounds in the right mid-anterolateral chest. Place a 12-mm trocar for the viewing port in the fifth or sixth intercostal space in the posterior axillary line. Place an 8-mm trocar for the right robotic arm in the posterior axillary line just anterior to the border of the scapula in the third or fourth intercostal space. Place an additional 8-mm trocar for the left robotic arm in the seventh or eighth intercostal space in the posterior axillary line, each of the two robotic arms approximately one hand bredth away from the videoscope port (Figure 24-4).
♦ Place two accessory ports at the level of the anterior axillary line: a 5-mm port at the level of the third intercostal space and a 12-mm port at the level of the sixth or seventh intercostal space. The upper port is used for suctioning and grasping instruments, and the lower port is used for placing a fan retractor for the lung, suctioning and grasping instruments, and introducing the sutures used for the thoracic duct ligation.
Step 3. Thoracic-Phase Docking
♦ Roll the robot into position. Place the robotic arms through the 8-mm trocars, and place the 0-degree videoscope through the 12-mm viewing port (Figure 24-5).
♦ Carbon dioxide is insufflated to a pressure of 10 mm Hg to evacuate electrocautery smoke and to compress the lung away from the surgical site.
