CHAPTER 8 Right Upper Lobectomy—video 8
Approach to Video-Assisted Right Upper Lobectomy
Order of Operative Steps
The order of the steps of the operation is as follows: level 10 nodes, RUL vein, anterior trunk of the pulmonary artery, minor fissure, posterior ascending artery, RUL bronchus, and the remainder of the fissure. The incisions are the standard incisions, with the utility incision placed directly up (lateral) from the superior pulmonary vein (see Chapter 1).
Key Points
♦ Complete resection of the tissue with the level 10 nodes exposes the right mainstem bronchus, superior vena cava (SVC), and anterior trunk. During dissection, the superior and posterior aspects of the anterior arterial trunk should be dissected well to mobilize the artery for subsequent transection.
 Video-Assisted Right Upper Lobectomy (Video 8-1)
Step 1. Level 10 Nodes
♦ The level 10 nodes are located within a triangle bounded by the SVC, azygous vein, and superior hilum of the lung.
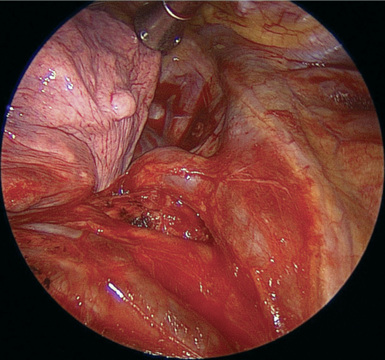
♦ Just posterior and parallel to the phrenic nerve, incise the pleura from the hilum to the azygous vein and then posteriorly along the azygous vein to the right mainstem bronchus (Figure 8-1).
♦ From the hilum, dissect posteriorly along the superior aspect of the RUL vein and along the vein from the apical segment. This exposes the anterior trunk.
♦ Remove all the tissue in this triangle, including the level 10 nodes. At this point, the right mainstem bronchus, anterior trunk, and SVC are well exposed.
♦ After the level 10 nodes are removed, dissect along the superior aspect of the anterior trunk and posteriorly between the trunk and the right mainstem bronchus. This facilitates subsequent mobilization of the artery for later transection.
Step 2. Right Upper Lobe Vein
♦ Clearly identify the RUL vein and the right middle lobe vein. Viewing the remnant of the minor fissure can help with orientation.
♦ Spread along the inferior aspect of the RUL vein. Lifting the vein shows the plane between the vein and the underlying pulmonary artery.
♦ Rotate the thoracoscope posteriorly with the lens pointed anteriorly to view the dissection between the vein and the artery.
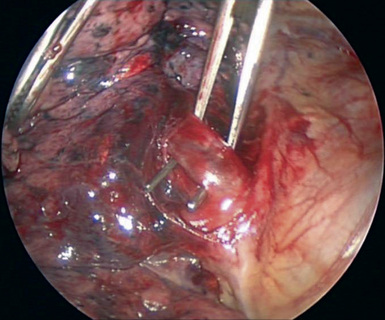
♦ To create a tunnel for the stapler, spread widely with a right-angle clamp between the RUL vein and the artery (Figure 8-2).
♦ Through incision 4, pass an endoscopic vascular stapler around the RUL vein. The anvil goes into the tunnel between the vein and artery. The stapler can be passed through incision 1, but the angle is better from the posterior incision (Figure 8-3).
Stay updated, free articles. Join our Telegram channel

Full access? Get Clinical Tree


