10 Echocardiography in the Patient with Right Heart Failure
Basic Principles of Right Ventricular Imaging
Step-by-Step Approach
Step 1: Analysis of Right Ventricular Size
Key Points
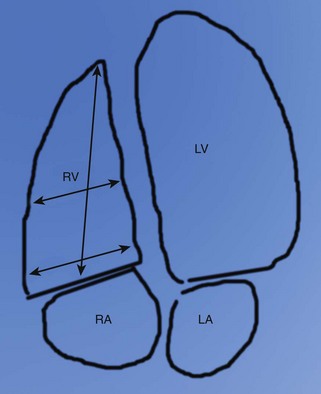
• Obtain two-dimensional (2D) images utilizing parasternal, right ventricular (RV) inflow, apical 4-chamber, and subcostal views.
• The RV has a crescent shape, with no accurate geometric representation.
• Measure RV basal, midcavity, and longitudinal dimensions from the apical 4-chamber view (Figure 10-1).
Step 2: Analysis of RV Volume and Systolic Function
Key Points
• For volume measurements using area-length and Simpson’s rule, assumptions of geometric shape are necessary and may not be accurate.
• Estimate RV systolic function qualitatively: normal, mildly reduced, moderately reduced, or severely reduced
• Estimate RV systolic function quantitatively using a combination of the following methods.

• On RV tissue Doppler, normal pulsed wave Doppler peak velocity at the tricuspid annulus is greater than 10 cm/s.
• Tricuspid annular plane systolic excursion (TAPSE) can be calculated from the apical 4-chamber view using M-mode and 2D techniques (see “Measurement of Prognostic Echocardiographic Parameters” below).
• Radionuclide ventriculography has been utilized historically for comparison with newer methods. However, due to the unique shape of the RV, three-dimensional (3D) echocardiography and cardiac magnetic resonance imaging (MRI) are best suited for accurate assessments of volume and systolic function (RV ejection fraction [RVEF]). These methods can be time consuming and are not widely available.
Step 3: Evaluation of RV Wall Motion
Key Points
• Septal and free wall motion should be assessed in multiple 2D views, including parasternal short-axis, apical 4-chamber, and subcostal views.
• RV volume and/or pressure overload can cause septal wall motion abnormality.
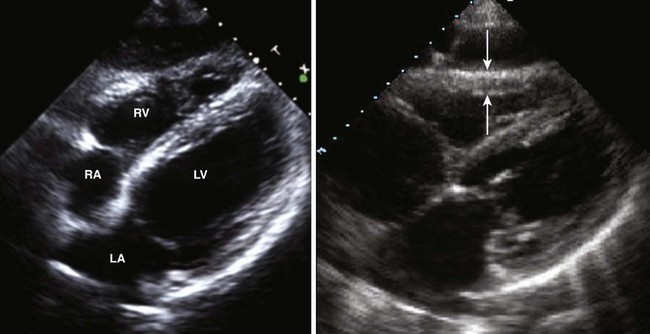
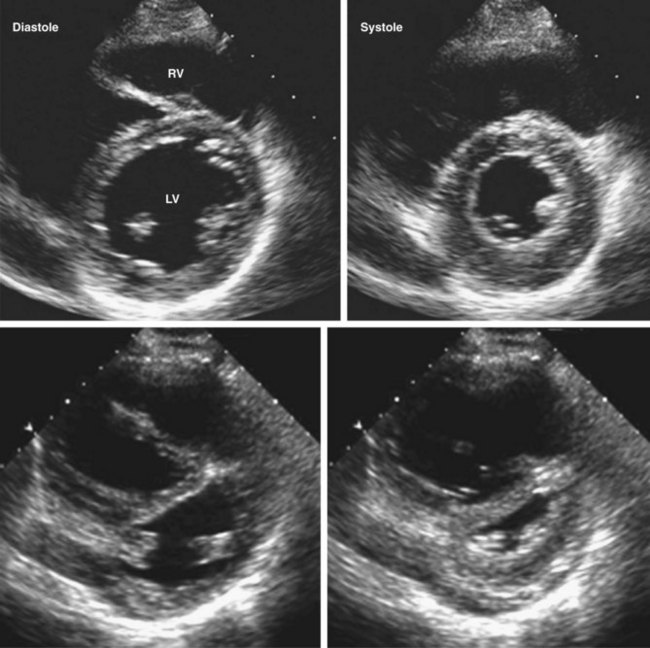
• Pressure overload of the RV causes flattening of the interventricular septum as a result of an abnormal pressure gradient between the RV and the LV, in essence pushing the septum toward the LV during both in systole and in diastole (Figure 10-3). Normally, when viewed in the parasternal short axis, the LV has the appearance of a symmetrical O or “doughnut.” With RV pressure or volume overload, the septum is D-shaped.
• Volume overload of the RV results in flattening of the interventricular septum during diastole only.
• Free wall motion should be assessed for regional wall motion abnormalities suggestive of RV infarction versus global wall motion abnormality.
Identify the Cause of Right Heart Failure
RV Infarction
• RV infarction is relatively rare. The vast majority of RV infarctions occur in the setting of acute inferior myocardial infarction.
• Obtaining right-sided electrocardiographic (ECG) leads in acute inferior myocardial infarction often helps in making the diagnosis.
• The characteristic hemodynamic sensitivity to alterations in preload is a hallmark of RV infarction and impacts upon treatment strategies.
Step-by-Step Approach
Step 1: Assess LV Wall Motion and Systolic Function, and Look for Mechanical Complications of Myocardial Infarction
Pulmonary Arterial Hypertension
• There are many etiologies of secondary pulmonary hypertension (Box 10-1). When pulmonary hypertension is suspected, a detailed search for an underlying cause should be performed. This section refers specifically to the evaluation of pulmonary arterial hypertension.
• Chronic pressure overload of the RV resulting from high pulmonary vascular resistance (PVR) results in pulmonary hypertension.
• There are echocardiographic signs of pulmonary hypertension that can be helpful in making the diagnosis and assessing disease progression and response to treatment.
• Echocardiography can be used to estimate PASP, pulmonary artery diastolic pressure (PADP), and PVR noninvasively (see “Measurement of Prognostic Echocardiographic Parameters” below).
Step-by-Step Approach
Step 1: Assess RV Size and Function
Key Points
• RV function is often preserved or hyperdynamic during this phase of disease and can be assessed using TAPSE and qualitative estimation.
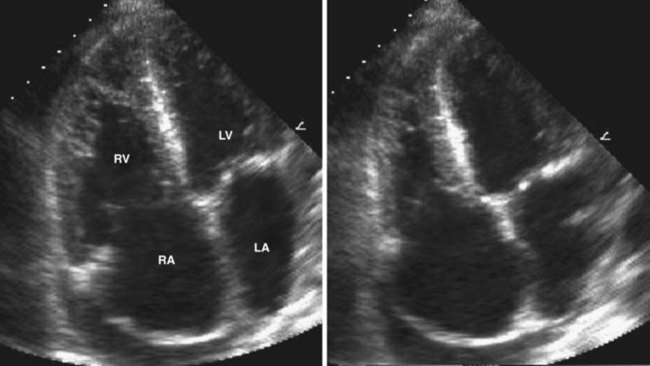
• With progressive increase in RV afterload, the RV initially hypertrophies and then dilates and the normal tricuspid valve geometry is disrupted, resulting in tricuspid regurgitation and systolic dysfunction leading to RV failure (Figure 10-4).
Step 2: Look for Associated Right Heart Findings of Pulmonary Hypertension
Key Points
• Doppler velocity curve of the RV outflow tract (RVOT)/PA has mid-systolic “notching” (Figure 10-6).
• The main PA may be enlarged (>2.5 cm) and should be measured from the left parasternal acoustic window if 2D image quality permits.
• There are septal wall motion abnormalities suggestive of RV pressure overload (described earlier in “Basic Principles of Right Ventricular Imaging”).
• In cases of severe pulmonary hypertension and RA enlargement, stretching of the foramen ovale may result in a right-to-left shunt.
Stay updated, free articles. Join our Telegram channel

Full access? Get Clinical Tree


