Airway Management
 Just the facts
In this chapter, you’ll learn:
♦ anatomy of the respiratory system
♦ effective techniques to open the airway
♦ use of airway, ventilation, and barrier devices
♦ use of oxygen administration devices.
Respiratory system basics
The major function of the respiratory system is gas exchange. Air is taken into the body on inhalation and travels through respiratory passages to the lungs. Oxygen in the lungs replaces carbon dioxide in the blood, and the carbon dioxide is expelled from the body on exhalation. (See A close look at the respiratory system, page 62.)
|

No interruptions, please
When respiratory function is interrupted, the whole body becomes compromised. Brain damage occurs within 5 minutes, and brain cell death occurs within 10 minutes. Therefore, maintaining a patent airway and restoring respiratory function are vital to advanced cardiac life support (ACLS) success.
Conducting airways
The conducting airways allow air into and out of the lungs. Conducting airways include the upper and lower airways.
You take the high road…
The upper airway consists of the nose, mouth, pharynx, and larynx. These structures allow air to flow into and out of the lungs.
They warm, humidify, and filter inspired air and protect the lower airway from foreign matter.
They warm, humidify, and filter inspired air and protect the lower airway from foreign matter.
A close look at the respiratory system
Get to know the basic structures and functions of the respiratory system so you can perform a comprehensive respiratory assessment and identify abnormalities. The major structures of the upper and lower airways are illustrated below. The pulmonary airway is shown in more detail in the inset.
|

Upper airway obstruction occurs when the nose, mouth, pharynx, or larynx becomes partially or totally blocked. Upper airway obstruction can stem from trauma, tumors, or foreign objects.
Key points
Basics of conducting airways
The upper airway consists of the nose, mouth, pharynx, and larynx.
The upper airway warms, humidifies, and filters inspired air.
The lower airway consists of the trachea, right and left mainstem bronchi, five secondary bronchi, and bronchioles.
The lower airways facilitate gas exchange.
Upper and lower airway obstruction occurs when a structure becomes partially or totally blocked.
…And I’ll take the low road
The lower airway consists of the trachea, right and left mainstem bronchi, five secondary bronchi, and bronchioles. These
structures facilitate gas exchange. Each bronchiole descends from a lobule and contains terminal bronchioles, alveolar ducts, and alveoli. Terminal bronchioles are anatomic dead spaces because they don’t participate in gas exchange. Conversely, the alveoli are the chief units of gas exchange.
structures facilitate gas exchange. Each bronchiole descends from a lobule and contains terminal bronchioles, alveolar ducts, and alveoli. Terminal bronchioles are anatomic dead spaces because they don’t participate in gas exchange. Conversely, the alveoli are the chief units of gas exchange.
The lower airway can become partially or totally blocked as a result of inflammation, tumors, foreign bodies, or trauma.
Airway management steps
Steps in airway management include proper positioning and manual techniques to open the patient’s airway. Without an open, or patent, airway, attempts to ventilate and oxygenate the patient won’t be successful.
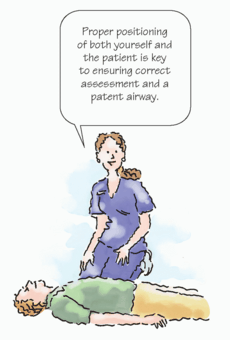
Proper positioning
When you approach a patient in possible cardiopulmonary compromise, the first step in airway management is proper positioning of both yourself and the patient. Without proper positioning, it’s difficult to assess the patient’s breathing and ensure a patent airway. You should be at the patient’s side, at about the level of his upper chest. From this position, you can perform both rescue breathing and chest compressions.
|
Supine is superlative
Initially, place the patient in a supine position on a firm, flat surface. You may find a patient lying face down or on his side. If so, roll the patient so that his head, shoulders, and torso move together. Avoid twisting the patient’s body. If you suspect the patient has a neck injury, use manual spine motion restriction to keep his head, neck, and spine in alignment and ensure that they don’t move. After the patient is in a supine position with his arms along his body, you can begin to assess him.
Opening the airway
A patient’s airway can become obstructed or compromised by vomitus, food, edema, his tongue or teeth, saliva, or a foreign object. The most common cause of airway obstruction is the tongue. Muscle tone decreases when a person is unconscious or
unresponsive, which increases the potential for the tongue and epiglottis to obstruct the pharynx.
unresponsive, which increases the potential for the tongue and epiglottis to obstruct the pharynx.
Assess airway patency. Check to see if the chest rises with inspiration and falls with expiration. Wheezing; suprasternal, supraclavicular, or intracostal retractions; and cyanosis may all point to airway obstruction.
Open for business
If rescue ventilations are indicated, open the airway using the head-tilt, chin-lift maneuver or the jaw-thrust maneuver. Use the head-tilt, chin-lift maneuver to relieve an upper airway obstruction caused by the patient’s tongue or epiglottis. (See Using the headtilt, chin-lift maneuver.) If you suspect a neck injury, use the jaw-thrust maneuver. (See Using the jaw-thrust maneuver, page 65.) If the jaw-thrust maneuver isn’t effective in opening the airway, use the head-tilt, chin-lift maneuver because opening the airway and providing adequate ventilation is a priority in cardiopulmonary resuscitation (CPR).
 Peak technique
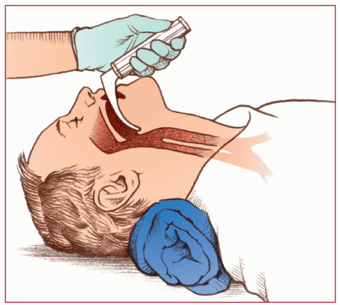
Using the head-tilt, chin-lift maneuver
If the patient doesn’t appear to have a neck injury, use the head-tilt, chin-lift maneuver to open his airway.
|
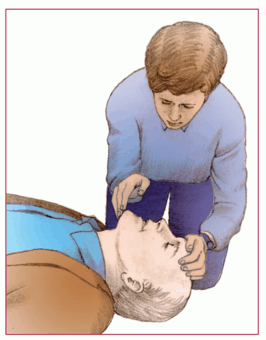
First, place your hand closest to the patient’s head on his forehead. Then apply firm pressure—firm enough to tilt the patient’s head back.
Next, place the fingertips of your other hand under the bony portion of the patient’s lower jaw, near his chin. Then lift the patient’s chin, making sure to keep his mouth partially open (as shown).
Avoid placing your fingertips on the soft tissue under the patient’s chin because this may inadvertently obstruct the airway you’re trying to open.
Key points
Opening an airway
Most common cause of airway obstruction: the tongue.
Upper airway obstruction caused by the patient’s tongue or epiglottis: Use the headtilt, chin-lift maneuver.
Neck injury (or if the head-tilt, chin-lift maneuver is unsuccesful): Use the jaw-thrust maneuver.
Foreign body airway obstruction: Remove the foreign object with subdiaphragmatic abdominal thrusts or chest thrusts (pregnant or obese patient).
 Peak technique
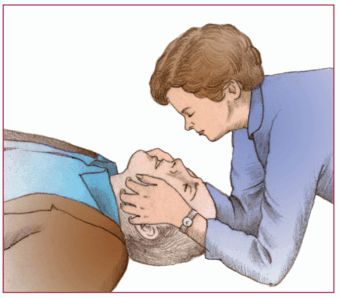
Using the jaw-thrust maneuver
If you suspect a neck injury, or if the head-tilt, chin-lift maneuver is unsuccessful, use the jaw-thrust maneuver.
Kneel at the patient’s head with your elbows on the ground. Rest your thumbs on the patient’s lower jaw near the corners of his mouth, pointing your thumbs toward his feet.
Then place your fingertips around the lower jaw. To open the airway, lift the lower jaw with your fingertips (as shown).
|
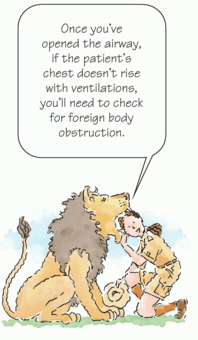
Obstinate obstructions
Address foreign body airway obstruction if the patient’s chest doesn’t rise with ventilations. Check the patient’s mouth to see if the foreign body is visible. If so, remove it. If it isn’t, remove the foreign object by using subdiaphragmatic abdominal thrusts or chest thrusts (on a pregnant or obese patient). Recheck the patient’s mouth to see if the foreign body is visible. If so, remove it.
Free and clear
After you clear the airway, the patient may begin breathing spontaneously. If so, deliver supplemental oxygen in the most effective but least invasive manner possible. If spontaneous breathing doesn’t occur, initiate rescue breathing using a barrier device until an advanced airway can be inserted.
|
Airway devices
If manual steps such as the head-tilt, chin-lift maneuver aren’t enough to maintain the patient’s airway, you may need to use an advanced airway device. Always follow standard precautions
and wear personal protective equipment, as needed, when using airway devices. Typically, these devices are used in an unconscious patient who has no gag reflex because insertion in a conscious patient would stimulate the gag reflex and increase the risk of aspiration. When it becomes necessary to use an advanced airway device in a conscious patient, administer sedation before insertion.
and wear personal protective equipment, as needed, when using airway devices. Typically, these devices are used in an unconscious patient who has no gag reflex because insertion in a conscious patient would stimulate the gag reflex and increase the risk of aspiration. When it becomes necessary to use an advanced airway device in a conscious patient, administer sedation before insertion.
This invasion saves lives
Advanced airway devices include the endotracheal (ET) tube, supraglottal airways (esophageal-tracheal tube airway, laryngeal tube airway, and laryngeal mask [LMA] airway), nasopharyngeal airway, and oropharyngeal airway. If the use of these advanced airway devices is unsuccessful or inappropriate, a transtracheal catheter or a surgical cricothyroidotomy may be necessary. These techniques may be explained during ACLS instruction; however, they are considered beyond the scope of practice of most ACLS providers.
During a cardiac arrest, the best device to use to manage the airway depends upon the patient’s condition, the provider’s experience, the health care facility, and the emergency response system available.
Staff training and the continual monitoring of skills, complications, and success are essential components of airway management.
Endotracheal tube
ET intubation involves inserting a tube through the patient’s mouth or nose into the trachea to obtain or maintain a patent airway. In the past, ET intubation was considered the gold standard of advanced airway control. Studies have shown, however, that the rate of complications due to staff inexperience may be unacceptably high. Frequent staff training, experience, and monitoring are required.
|
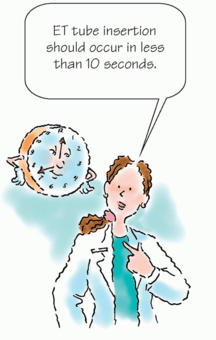
10 seconds on the clock
Only health care practitioners trained and experienced in ET tube insertion should perform the procedure. First, you’ll ventilate the patient with 100% oxygen via a bag-mask device. During CPR, chest compressions should be interrupted only for the time required for the intubating provider to visualize the vocal cords and insert the ET tube, ideally in less than 10 seconds.
Intubation indications
ET intubation should be performed when a patient who’s unable to maintain adequate spontaneous ventilation has ineffective
airway protective reflexes. It’s used in patients receiving general anesthesia and in those with:
airway protective reflexes. It’s used in patients receiving general anesthesia and in those with:
cardiopulmonary arrest
respiratory distress or failure
persistent apnea
obstructive angioedema (edema involving the deeper layers of the skin, subcutaneous tissue, and mucosa)
upper airway hemorrhage
risk of increased intracranial pressure
laryngeal or upper airway edema
absent swallowing or gag reflexes.
What you need
Sedative, if appropriate
Laryngoscope, comprised of a handle (where the batteries for the light source are housed) and a blade (curved or straight) with a light bulb
ET tube of proper size and type (for average adult men, use size 8 mm; for average adult women, use size 7.5 mm); also have available ET tubes that are 0.5 mm and 1 mm smaller than the selected size for cases in which the initial size you choose is inappropriate for the patient; tubes with low-pressure cuffs are used in patients older than age 8
Stylet of appropriate size for tube to facilitate proper tube insertion; plastic-coated for ease of insertion into the tube (may be lubricated with water-soluble lubricant); must end ½” (1.3 cm) before it reaches the distal end of the tube
10-cc syringe to inflate tube cuff
Magill forceps to assist with tube placement or to remove foreign matter from the airway
Water-soluble lubricant
Suction device (both rigid and soft devices should be available)
Bag-mask device and oxygen source
Oral airway or bite block
Tape or tube holder
Extra laryngoscope batteries and bulbs
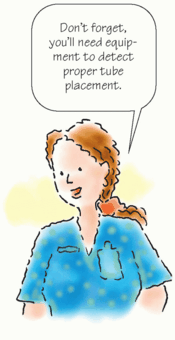
Equipment to assist with detecting proper placement (pulse oximeter, end-tidal carbon dioxide [ETco2] detector, waveform capnography, if available, and stethoscope)
Personal protective equipment (gown, gloves, and goggles)
|
How it’s done
Begin by assembling the equipment and checking it for proper functioning. Select the proper size and type of blade, either the straight (Miller) blade or the curved (Macintosh) blade, according to the
patient’s size. Attach the blade to the laryngoscope and snap it to a right angle to test the light.
patient’s size. Attach the blade to the laryngoscope and snap it to a right angle to test the light.
Inflate the tube cuff to detect air leaks and check the tube lumen for patency, keeping it in the sterile wrapper until you use it. Check that the adapter fits snugly into the ET tube’s proximal end.
Next, prepare the patient:
Assess respiratory status and color.
Place the patient’s head in the sniffing position to align the airway and visualize the larynx. Remove the patient’s dentures, if present. (See Essential anatomic landmarks.)
Preoxygenate using a bag-mask device and 100% oxygen.
Administer a pharmacologic agent, if appropriate (such as a sedative to induce sleep and relax the patient and a paralyzing agent to prevent movement, if necessary).
Perform hand hygiene and put on personal protective equipment.
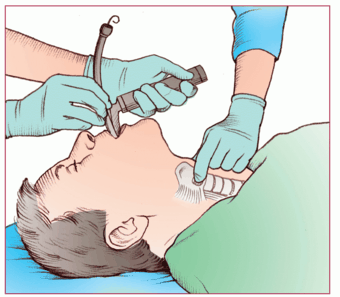
Now begin the procedure to insert the tube:
Hold the laryngoscope in your left hand.
Hold the ET tube in your right hand.
Insert the lubricated blade into the right side of the patient’s mouth, and advance it midline to the base of his tongue.
After visualizing the arytenoid cartilage, lift the epiglottis directly with the straight blade or indirectly by inserting the curved blade into the vallecula. (See Varying technique with blade type and Structures seen during direct laryngoscopy, page 70.)
Expose the larynx by pulling the handle of the laryngoscope in the direction toward which it points (90 degrees to the blade); don’t cock the handle (especially with the straight blade) because doing so may fracture teeth.
Lift forward and upward to expose the glottis.
Insert the ET tube to the right of the laryngoscope and into the trachea, passing through the vocal cords.
If you can visualize the arytenoid cartilage but not the glottis, have another person apply cricoid pressure or use a curved stylet to direct the tube anteriorly. (See Applying cricoid pressure, page 71.) During a cardiac arrest, cricoid pressure shouldn’t be used routinely because it can impede ventilation.
Remove the laryngoscope while holding the tube in place.
Remove the stylet.
Look for tube depth marks between the 19- and 23-cm marks at the front teeth.
Inflate the cuff using a cuff manometer to verify the correct amount of pressure.
Attempt to ventilate the patient using the bag-mask device with an adapter attached to the ET tube.
Insert an oral airway or a bite block, if necessary, to prevent occlusion of the airway caused by the patient biting and occluding the tube.
Now assess for placement. Check that:
the patient’s chest rises and falls with each ventilation
breath sounds are auscultated using a five-point check (left and right anterior chest, left and right midaxillary points, and over the epigastrium)
ETco2 measurement indicates the presence of carbon dioxide (Co2), confirming that the tube is in the trachea
continuous waveform capnography confirms ET placement by CO2 detection (see Waveform capnography, page 72)
oxygen saturation is improved using pulse oximetry.
Obtain a chest x-ray to confirm proper ET placement above the carina.
|
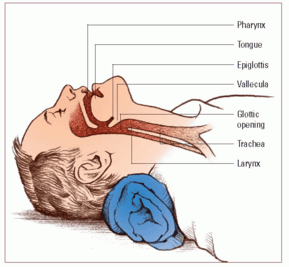
Essential anatomic landmarks
Locate the landmarks shown here when inserting an endotracheal tube through the oral cavity. These landmarks will help you ensure proper tube placement.
|
 Peak technique
Varying technique with blade type
You need to vary your laryngoscope technique during intubation depending on the type of blade used.
Curved blade
If you use a curved blade, apply upward traction with the tip of the blade in the vallecula. This displaces the epiglottis anteriorly (as shown).
Straight blade
If you use a straight blade, lift the epiglottis anteriorly, exposing the opening of the glottis.
|
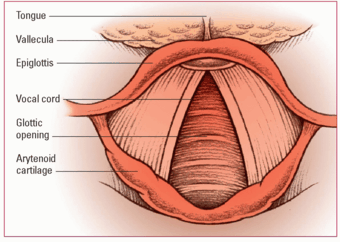
Structures seen during direct laryngoscopy
Locating anatomic structures with a laryngoscope is the key to successful intubation. This illustration shows the anatomic structures of the larynx.
|
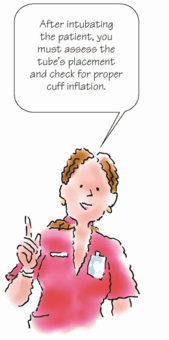
Inflation In moderation
Overinflation of the balloon can affect its integrity, resulting in an air leak. To check for proper cuff inflation, make sure that no audible leaks are present. If you detect a leak, remove air from the balloon and reinflate. If the leak persists, you must replace the ET tube.
Overinflation can also result in tracheal damage. Too much pressure can injure the tracheal mucosa, which can lead to tracheal necrosis if not corrected. Use a cuff manometer to verify the correct amount of pressure.
Strive for stability
Next, stabilize the ET tube. You may use a commercially produced ET tube holder or tape or ties to secure the tube so that it’s immobile. If you use a commercial product, follow the manufacturer’s directions. If you use tape:
Tear about 2′ (60 cm) of tape, split both ends in half about 4” (10 cm), and place it adhesive-side up on a flat surface.
 Peak technique
Applying cricoid pressure
Also called the Sellick maneuver, the cricoid pressure technique involves applying pressure to the patient’s cricoid cartilage, which displaces the trachea posteriorly, compressing the esophagus.
Cricoid pressure may help prevent gastric inflation, reducing the risk of vomiting and aspiration. It’s contraindicated in a conscious patient and isn’t recommended for routine use during cardiac arrest because it may impede ventilation or interfere with the placement of a supraglottic airway or intubation.
Health care professionals should apply cricoid pressure only when a third rescuer is present.
To apply cricoid pressure:
Locate the patient’s thyroid cartilage with your index finger; then slide your index finger to the base of the thyroid cartilage.
Palpate the prominent horizontal ring, which is the cricoid cartilage.
Apply firm but moderate pressure to the cricoid cartilage using the tips of your thumb and index finger (as shown).
|
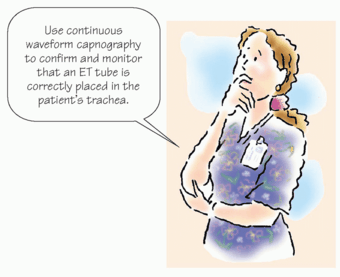
Waveform capnography
Studies of waveform capnography to verify endotracheal (ET) position in victims of cardiac arrest have shown 100% sensitivity and 100% specificity in identifying correct ET tube placement. ET tubes can be easily displaced during such activities as transfer or transport. Continuous waveform capnography is recommended, in addition to clinical assessment, as the most reliable method of confirming and monitoring correct placement of the ET tube.
If waveform capnography isn’t immediately available, exhaled carbon dioxide (CO2) detectors, in addition to clinical assessment, can be used as the initial method for confirming correct tube placement. However, studies of exhaled CO2 detectors indicate that the accuracy of these devices doesn’t exceed that of auscultation and direct visualization of the vocal cords for confirming the tracheal position of an ET tube.
|
Tear another piece of tape about 10” (25 cm) long and place it adhesive-side down in the center of the 2” piece.
Slide the tape under the patient’s neck and center it.
Bring the right side of the tape up and wrap the top split end counterclockwise around the tube; secure the bottom split end beneath the lower lip.
Bring the left side of the tape up and wrap the bottom split piece clockwise around the tube; secure the top split above the patient’s upper lip.
If you’re using ties:
Cut about 2’ (60 cm) and place it under the patient’s neck.
Bring both ends up to the tube and cross them at the bottom of the tube near his lips.
Bring the ends to the top of the tube and tie an overhand knot.
Bring the ends back to the bottom of the tube, tie another overhand knot, and then secure it with a square knot (right over left, left over right).
|
Reconfirm tube placement after you’ve finished securing the tube. Following ET intubation, monitor continuous waveform capnography to verify ET tube placement. Assess bilateral breath sounds and equal chest movement every 5 to 10 minutes.
Sock it to secretions
Suction the patient, as necessary, through the ET tube to remove secretions. (See Open tracheal suctioning, pages 74 and 75.) After the patient is connected to the ventilator, in-line suctioning is the preferred method of ET suctioning. (See Closed tracheal suctioning, page 76.)
What to consider
Practitioners who perform ET intubation need adequate training and frequent experience to reduce the risk of complications, such as oropharyngeal trauma and hypoxemia.
ET intubation isn’t an ideal intubation method for patients with suspected cervical spine injury.
Awake or uncooperative patients may need a short-acting muscle relaxant before ET intubation while you maintain the airway with a bag-mask device.
Esophageal-tracheal tube airway
The esophageal-tracheal tube airway consists of a plastic tube with two lumens and a ventilation bag attachment port for each lumen. Proximal and distal balloons help secure the tube and prevent ventilation gases from escaping around the tube. Rings on the proximal tube indicate the depth of the tube’s insertion and should be at the level of the patient’s teeth. The pharyngeal lumen of the tube has the longer primary port (port #1) at the proximal end, holes along the lumen between the balloons for supraglottic ventilation, and a blind distal end. The tracheoesophageal lumen has the shorter secondary proximal port (port #2), is patent between the balloons, and has an open distal end.
 Memory jogger


